The first VM for my lab is the OpenBSD router. OpenBSD has a phenomenal security track record, no additional software needs to be installed and you're guaranteed the latest and greatest pf. That last point is *especially* important to me because, IN MY PERSONAL OPINION, pf in FreeBSD sort of stagnated. That's not to say it's bad, it's just based on a fairly old version of OpenBSD's pf and doesn't support some of the things I really like (like the ability to dump the pfsync interface).
I'm going to skim over some very important things in this post. For example, this is not an introduction to learning the 'vi' editor, the basics of the Unix command line or an overview of using VirtualBox. There are tutorials and intros out there that are far better than I could cover the topics. My assumption is that you either know some Unix (or Linux) and networking basics or are interested enough to use your favourite search engine to figure out how to edit files, what certain commands do, etc.
With that, let's get started!
Getting OpenBSD
OpenBSD is available for download "for free". If you like OpenBSD, please consider either buying it or making a donation to the OpenBSD Project:
https://www.openbsd.org/orders.html
https://www.openbsd.org/donations.html
Disclaimer: I am not affiliated with the OpenBSD Project in any way other than as a happy user of their software.
If you choose to download OpenBSD, you can select your download location from their list of mirrors:
https://www.openbsd.org/ftp.html
I grabbed my ISO from the MIT mirror. VirtualBox is 64-bit OS friendly so I always use the amd64 port (quick link to the latest as of writing: http://mirrors.mit.edu/pub/OpenBSD/6.0/amd64/install60.iso).
For production use, I would absolutely recommend verifying the SHA hash for your download!
A New VirtualBox VM
The first step is to create a VM for the router. This is pretty straight-forward. VirtualBox is not just 64-bit friendly, if you choose BSD as your virtual machine type you can choose "OpenBSD (64-bit)" as your version!

For this scenario I'm going to accept all of the defaults. This means very meager resource allocations - but that's okay, it's enough for this purpose. This means a virtual machine with 64MB of RAM and 2GB of disk. Very meager indeed!
Installation
For almost any VM installation, you'll use the ISO file as a CD/DVD. This is done through the "Storage" section of the VM settings -- just choose the installation ISO as the optical drive and start the VM:

As soon as the VM boots you'll have the option to begin the installation:

The installation process is very quick and very straight-forward, especially if you are doing a "vanilla" installation. Advanced users will want to do interesting things like changing partition sizes but I will, once again, accept all of the defaults.
The one exception is that during the install process you may receive a message similar to, "Directory does not contain SHA256.sig. Continue without verification?". It is safe, in testing, to say "Yes".
When the installation completes you can send the VM the power off signal.
Making a Clone
I am a stickler for having a "reference" installation that I can keep updated, basically a template version of each operating system that I can use to make copies so I don't have to do a new install each time I want to try something out. Since I need to make some quick changes to this VM before booting and configuring the router anyway, this is a good time to make a full clone.
First, make sure to remove the OpenBSD install ISO as a storage device (Storage under the VM properties)!
To make the clone, just right-click the VM and choose "Clone", then select "Full Clone". You may not even see the progress meter since the VM is so small. I named mine "OpenBSD Router".
Two Networks
Since the clone VM is going to be a router, now is the time to add the second network interface. This is done through the Networking section of "Settings":

NB: by default, the "Name" field may say "intnet" - I clicked the box and named it "LabServerNet" since the first network I want to add is for my server VMs!
Make it a Router
The OpenBSD project has some fantastic documentation regarding configuring OpenBSD to be a router. That documentation can be found at:
https://www.openbsd.org/faq/pf/example1.html
It is not my goal to duplicate that. Instead, I'm going to do the bare minimum to have a basic router that meets my needs. To that end, everything I do below is stolen from that page so please please PLEASE read their documentation -- aside from fantastic software, the OpenBSD project has some of the best, if not THE best, documentation available. Use it!
First, you should have an em0 interface that has an IP address:

You should also have an em1 interface that does NOT have an IP address:

This naming scheme is perfect, in my opinion. It is easy for me to remember that em0 is the outside interface and em1 is the inside interface (0 == outside, 1 == inside).
Next I want to make sure the internal interface has an address. For some reason I'm partial to 10.10.10.0/24 as my internal network so that's what I'll assign to that interface:
ifconfig em1 10.10.10.1 netmask 255.255.255.0 up
Checking ifconfig for em1 should now be more interesting:
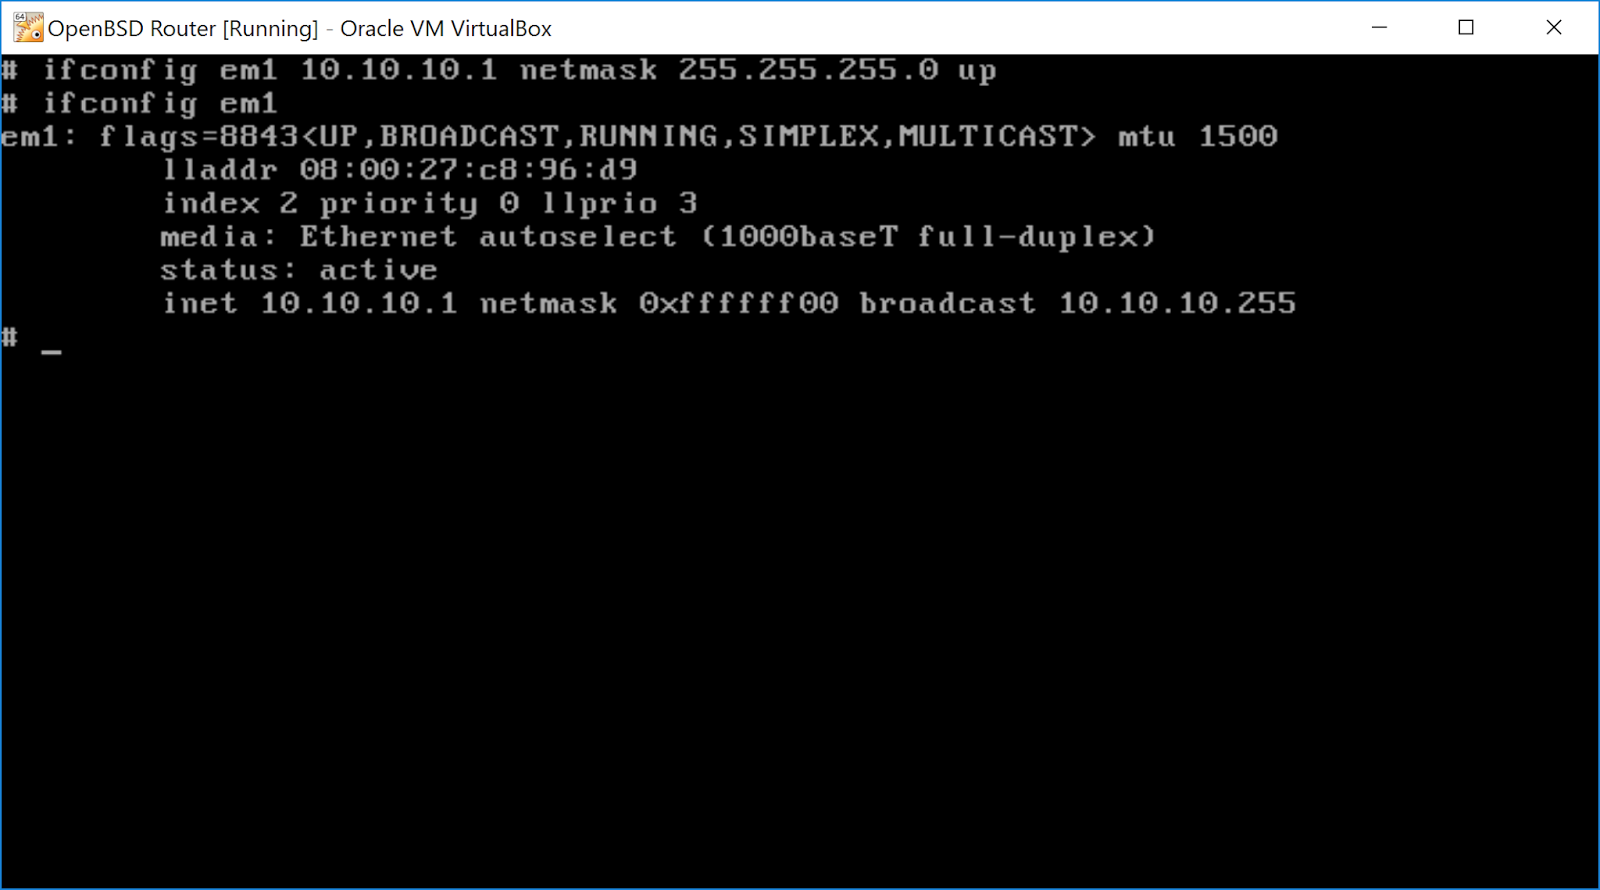
To make this persist through a reboot, you need to make sure there is a file in /etc that corresponds to the interface. This is specific to OpenBSD and makes configuring an interface very straightforward (certainly more maintainable, in my opinion, than something like /etc/networks/interfaces!). For em1, that means creating /etc/hostname.em1 and making sure the configuration for em1 is added. You can do this with a one-line command!
echo 'inet 10.10.10.1 255.255.255.0 10.10.10.255' > /etc/hostname.em1
This means, "assign the IPv4 address 10.10.10.1, with a netmask of 255.255.255.0 and broadcast of 10.10.10.255, to the network interface labelled em1".

To make sure OpenBSD knows to forward IPv4 traffic between interfaces, enable IP forwarding in /etc/sysctl.conf. Again, this is a one-liner!
echo 'net.inet.ip.forwarding=1' >> /etc/sysctl.conf

This setting will take effect after you reboot the VM (but you don't need to do that yet!).
Note also that this time I used '>>' instead of '>'. If you're new to Unix, '>' will overwrite whatever is in the file (which is fine if you're creating a file) and '>>' will append if the file already exists (which is really what I find myself doing most of the time and is safer than using '>' if there is ANY question as to whether you need to keep what's already there).
pf
By default, pf is enabled and running. You can verify this with
pfctl -s s
On a fresh installation, don't be surprised if you see connections to port 123 on a remote system. NTP, the Network Time Protocol, is active by default to make sure your VM keeps its clock up-to-date. Don't worry, this doesn't mean someone hacked your VM!
Configuring pf to NAT is a simple one-liner added to the end of /etc/pf.conf (note: I am assuming you know how to use vi to edit a file; if you don't, you want to learn the vi basics since it's found on almost all Unix installations and many Linux installations by default):
pass out on em0 inet from em1:network to any nat-to em0
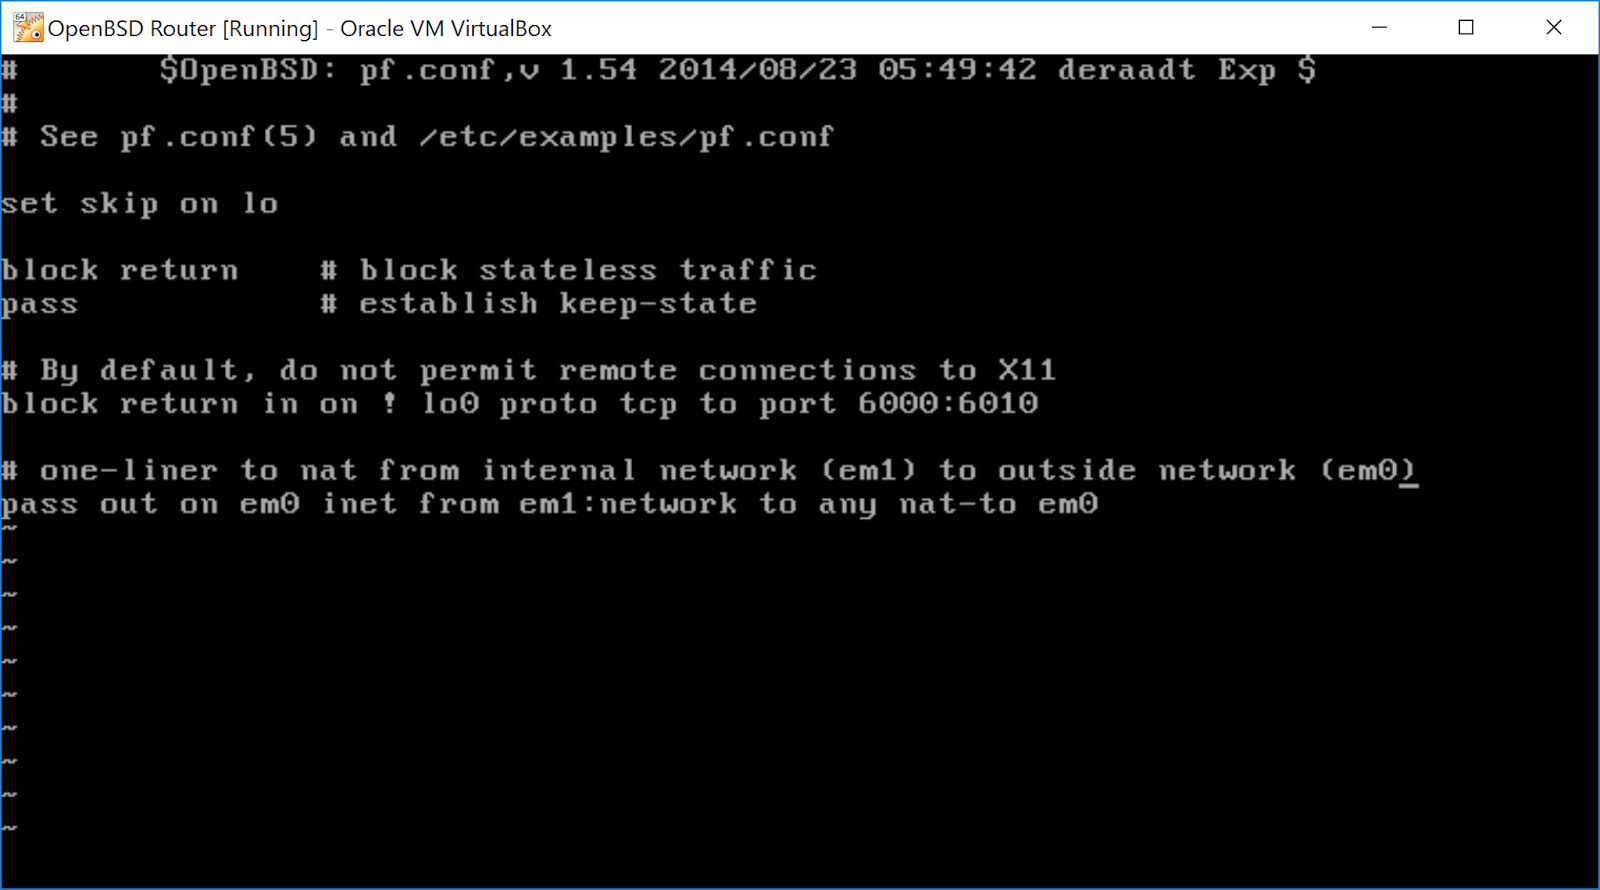
What does that say?
Basically, that says, "let IPv4 traffic from any IP address in the same network as em1 go to anywhere and make it have a source address of em0". Again, please read the OpenBSD documentation for PF and NAT. The actual NAT FAQ for pf can be found here:
https://www.openbsd.org/faq/pf/nat.html
Reboot
At this point you should be able to reboot and test the router. This means you'll need another VM on the LabServerNet network and configured to use 10.10.10.1 as its gateway. A quick and easy way to do that is to clone the original OpenBSD VM to another clone just to use as a test VM. I cloned the VM to "OpenBSD Test", set the first interface to use LabServerNet and boot it up, then configured em0 to use the new router with:
ifconfig em0 10.10.10.10 netmask 255.255.255.0 up
route add default 10.10.10.1
Then I tested everything by doing a DNS lookup for google.com against Google's DNS servers:
dig google.com @8.8.8.8
The whole thing looked like this:

On the router itself, I logged in and checked the pf state table with "pfctl -s s". This returned:

Success!
Summary
There is a LOT of really good documentation from the OpenBSD project, please read it. They cover configuring pf and routers much, much better than I can. I just wanted to hit the highlights for a very, very basic router (the "quick and dirty" setup). As a Linux sys-admin I was very fond of ipchains, then of iptables/netfilter, but I have always been partial to pf on OpenBSD and FreeBSD.
With the router ready, I can start building out the rest of the lab!


Thanks for the great info
ReplyDeleteDo you happen to know what the route syntax is for the latest PF / OpenBSD 11 ?
The 'nat-to' command seems to generate a syntax error in this line:
pass out on em0 inet from em1:network to any nat-to em0
I have tried a number of variations including:
nat on em0 from em1:network to any -> em0
No syntax errors-- but also doesn't seem to work
Are you sure you're on OpenBSD? FreeBSD is at version 11 but OpenBSD is only at version 6.1.
Deletepass out on em0 inet from em1:network to any nat-to em0
is proper syntax for pf in the current OpenBSD release. The User's Guide is fantastic and the source for that syntax is here:
https://www.openbsd.org/faq/pf/nat.html
The FreeBSD syntax is the one you referenced with "nat on em0...".
Since 'pass out ... nat-to em0' threw a syntax error, I'm going to guess and say you're on FreeBSD, not OpenBSD. That's okay, FreeBSD's pf still gets the job done :)
Did you make sure to add ip.forwarding via sysctl? For both FreeBSD and OpenBSD you can do it once via:
sysctl net.inet.ip.forwarding=1
To do it at boot on FreeBSD, you need to add a 'gateway_enable' line to /etc/rc.conf:
gateway_enable="YES"
One thing that has bitten me more times than I care to admit is forgetting to actually enable pf. I once spent *hours* debugging a nat problem, only to have a coworker ask me if I'd actually enabled pf. On OpenBSD it's enabled by default; on FreeBSD you have to add:
pf_enable="YES"
to /etc/rc.conf then running:
service pf start
You can also use "pfctl -e" if you want to start it as a one-off.
A really good starting point for FreeBSD's pf documentation is the FreeBSD Handbook. Its pf documentation is here:
https://www.freebsd.org/doc/handbook/firewalls-pf.html
Good luck!!